RVs require a good amount of maintenance on the inside and outside. Because of all the polished and treated metal, you might not think that rusting will be one of the issues you need to deal with on a motorhome or travel trailer. However, all RVs can develop surface rust over time if they aren’t properly cared for.
It’s important to deal with this rust so that it doesn’t break down important pieces of the vehicle and weaken the whole structure. Before you treat it, it’s important to know where it came from and how to prevent it in the future so this doesn’t become a recurring problem.
Why Does Surface Rust Form?
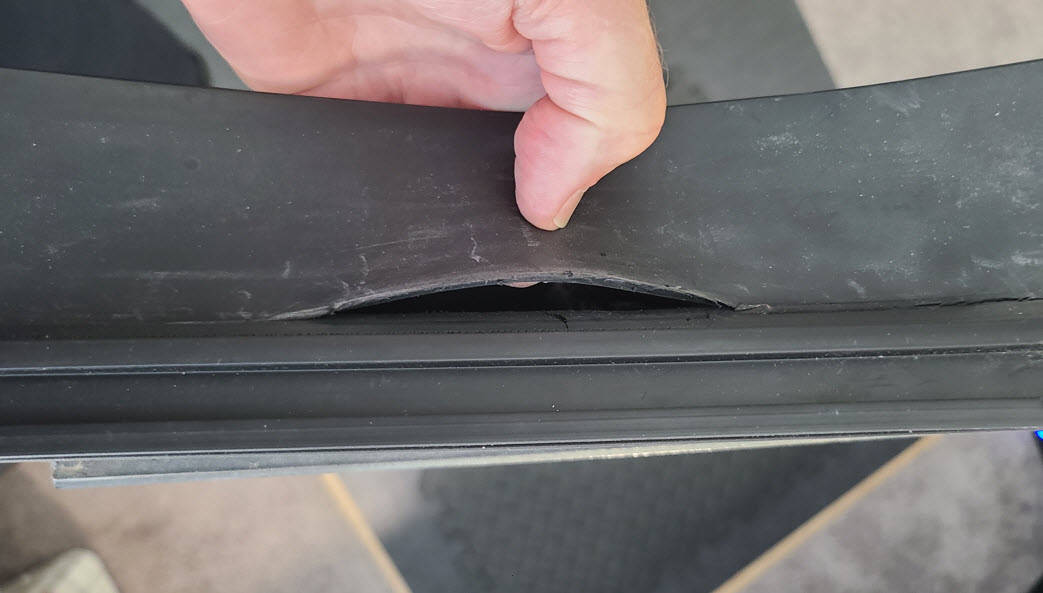
Rust is the enemy of all metal items and there are few things that can cause it to show up on your RV. If your camper has been scratched or scuffed, this can expose some of the metal below the paint/varnish. Small collisions frequently strip off the protective sealant and outer layers protecting the metal. Once this is in the open air, it’s vulnerable to rusting. Even new RVs get surface rust just from sitting on dealer lots.
Undercarriage rust can also form if your RV endures constant exposure to rock salt that scrapes along the undercarriage or other parts of the frame. Finally, living in humid or beautiful coastal destinations like Florida can cause rusting much more quickly due to the extra moisture and salt in the air. RVs are at higher risk of frame rust when they’re kept in these conditions.
Basically, if you see any exposed metal on your camper (even if it’s just a small spot) you need to be on the lookout for rusting in the future. Once a little piece starts to oxidize, it can spread and weaken the whole vehicle.
As long as its only surface rust, minor rust is normal. If the steel seems compromised, this will be a problem shortly. Some rvs may have been driven on salty roads in the winter, or parked by the salty ocean spray. These ones may have excessive corrosion. If you are not sure, have it inspected. My friend bought an 03, and had to replace half of the basement supports due to rust. He got a good deal and knew it needed repaired. All else was good.
@winniman, iRV2 Forums Member
First, Inspect for RV Rust Damage
When you want to remove surface rust, you first need to spot all of the problem areas. You can treat your RV rust repairs on a case-by-case basis by just covering up rust stains as they appear, but it’s important to regularly and thoroughly inspect the RV so you can catch issues before they grow into something major.
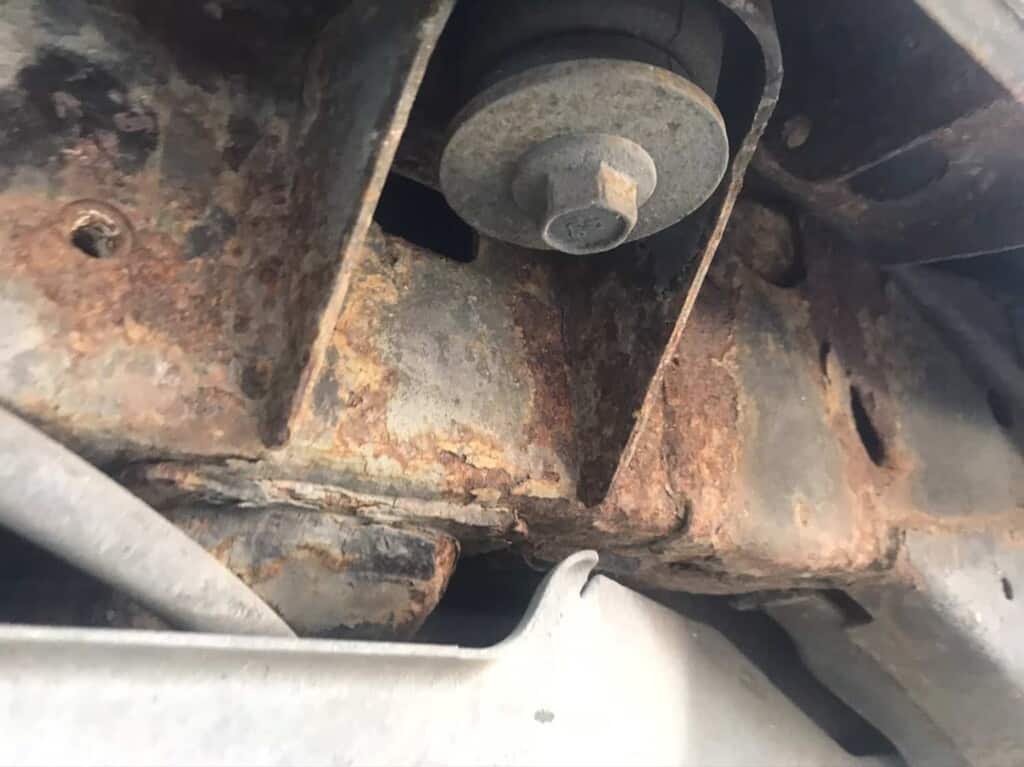
Don’t forget to check the vehicle’s undercarriage as well! The RV underbelly is one of the biggest areas that is affected by surface rust even if it’s usually not visible. Dirt, rocks, road salts, plants, and other rough items can easily scratch the RV’s frame and create patches that are vulnerable to rust. When you’re doing your routine inspection, slide under your RV with a good flashlight to check the undercarriage for signs of damage.
A Step-by-Step Guide to Remove RV Rust
If you do spot any surface rust, it’s important to address it as promptly as possible. Luckily, this is usually pretty easy and can be done in just a few steps. You can purchase all the products at any hardware store like Home Depot.
Begin by putting on protective glasses, gloves, and a mask to avoid breathing rust dust.
Then sand off the rust with sandpaper or a stiff nylon brush. Avoid wire brushing if possible. You don’t want to be too harsh when you do this because you don’t want to damage the surrounding area. You can use mechanical sanders, but sometimes it’s best to remove loose rust by hand unless the rust is really stubborn.
Scrub off as much of the rust as possible. Continue until you’re left with bare metal.
You may wat to turn to a rust converter if the rust removal process appears too daunting, or if hand removal is not working. These products can make RV rust removal fast and easy if you know what you’re doing. See this rust removal article for instructions.
“Rust converter is really neat stuff. It’s a synthetic polymer that converts existing rust into a black, paintable surface. Then it completely prevents the previously rusted metal from further rusting. Rust converter works best when the surface still has some rust on it, so you won’t need to sand the surface. Just make sure there are no large flakes of rust.”
Step 3: How to Apply Rust Converter, DoItYourselfRV.com
How to Protect Exposed Metal from RV Rust
You just got rid of the rust, but now you’re still left with the root of the problem: exposed metal. Now you need to focus on protecting it for the future and covering it up.
Wipe the area down and let it dry so there are no remaining rust particles.
Mask off the areas around the exposed metal with tape or some other protective covering. You’ll be applying spray primers and paints soon and don’t want these substances to spread to the surrounding areas.
Once everything else has been covered, put on gloves. Apply a paint primer designed for metal surfaces.
This will help the paint stick to the bare area and prevent any further oxidation. Once the primer has set, apply a layer of paint to the area. If it seems thin or runny, don’t be afraid to use multiple coats.
Now you’re pretty much done! You just need to remove the tape around your work space and apply a protective wax to the RV exterior.
Your RV is Now Protected from Rust (for a while!)
These layers of paint will provide protection against further damage and surface rust. Repeat this process as often as necessary whenever your spot bare metal or signs of rust.
If the RV has been severely damaged and pitted by rust, you may need help from a professional. As much as we hate to admit it, some DIY RV jobs are just too big to undertake at home. In addition, the damage is sometimes severe enough that a section needs to be replaced, not repaired. If you have an RV with major surface rust issues, leave it in the hands of the experts.
You also may want to bring your RV to the shop if there is rust on the undercarriage. This area is harder to access and may require special tools to clean.
How to Prevent Future RV Rust
If you want to prevent rusting before it gets out of hand, you need to focus on protecting the metal of your RV. Most RVs are made of fiberglass (which doesn’t rust) or painted metal. Many campers will have metal bumpers and other components though. All of these can be put at risk if they get scratched or exposed to humidity.
Related Articles: