Bathrooms are one of the most important but overlooked features in an RV. If your RV bathroom can use a touch of glam, these five easy, affordable RV shower upgrades are the way to do it without spending a ton of cash.
These RV Shower Upgrades Take Bathrooms from Drab to Divine
If your RV has one of the more typical camper bathrooms, the RV shower is probably not your camper’s best feature. Some luxury RVs have roomy, luxurious bathrooms nicer than the ones in any sticks ‘n’ bricks home. But many don’t. That was the case in our 30’ Class A motorhome.
The 36” x 24” shower unit was functional, but cramped, as well as lacking in other aspects. We wanted to improve it with some RV shower upgrade ideas of our own. Let’s take a look at the upgrades and modifications we did and you might want to try a couple in your RV.
Upgrade Your RV Shower Skylight in 5 Easy Steps
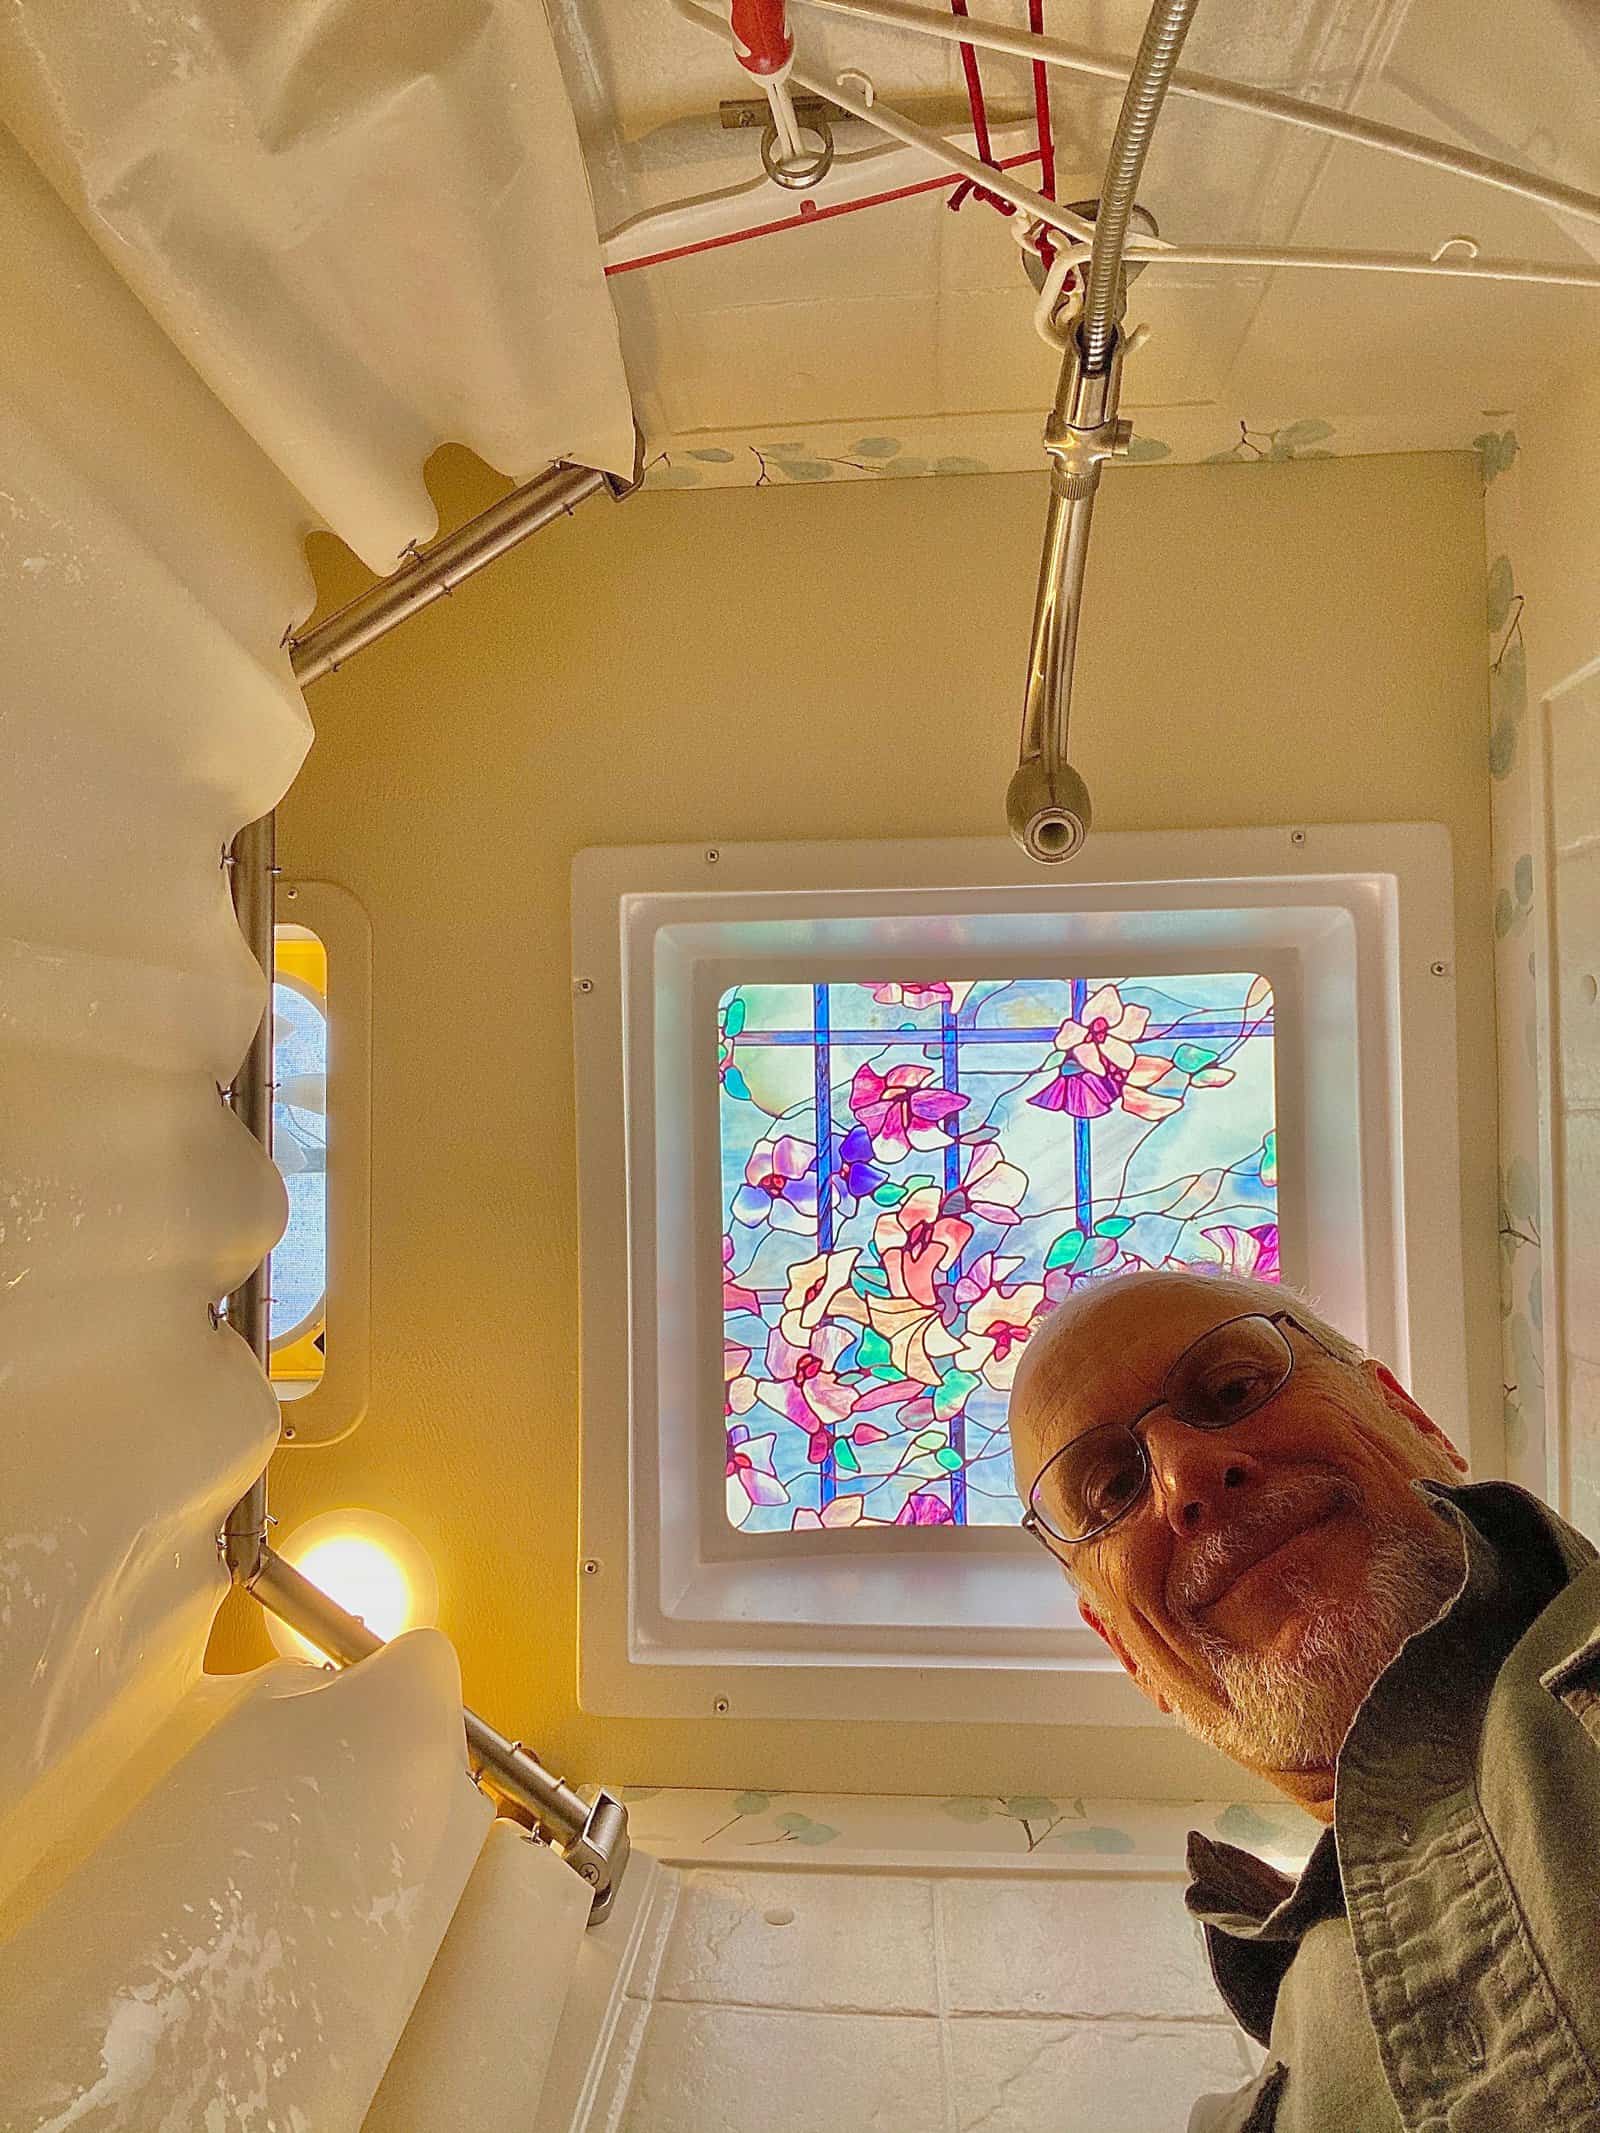
Here’s an easy and inexpensive RV shower upgrade that brightens our day every time we take a shower in the RV: Install decorative window cling film in the RV shower skylight.
If your RV shower skylight has an interior section sandwiched up to the exterior “bubble” roof section, you can mount the decorative cling-film on the upper side of the interior skylight section. Here’s how:
- Remove the screws
- Drop the interior section down
- Cut the cling-film to size
- Mount it on top of that section according to the cling-film directions.
- Re-attach the section up into the skylight, opening and you’re done.

(Image: Erik Anderson)
For our skylight RV shower upgrade, we purchased the Artscapes brand of decorative cling-film at Home Depot. This company makes their products in the USA and they also have an Amazon Artscape Store.
There are also several other brands and multiple decorative cling film designs available online through Amazon. Our cling-film has been up there for over four years and still looks like new. We love the custom, colorful look it adds to the RV shower stall!
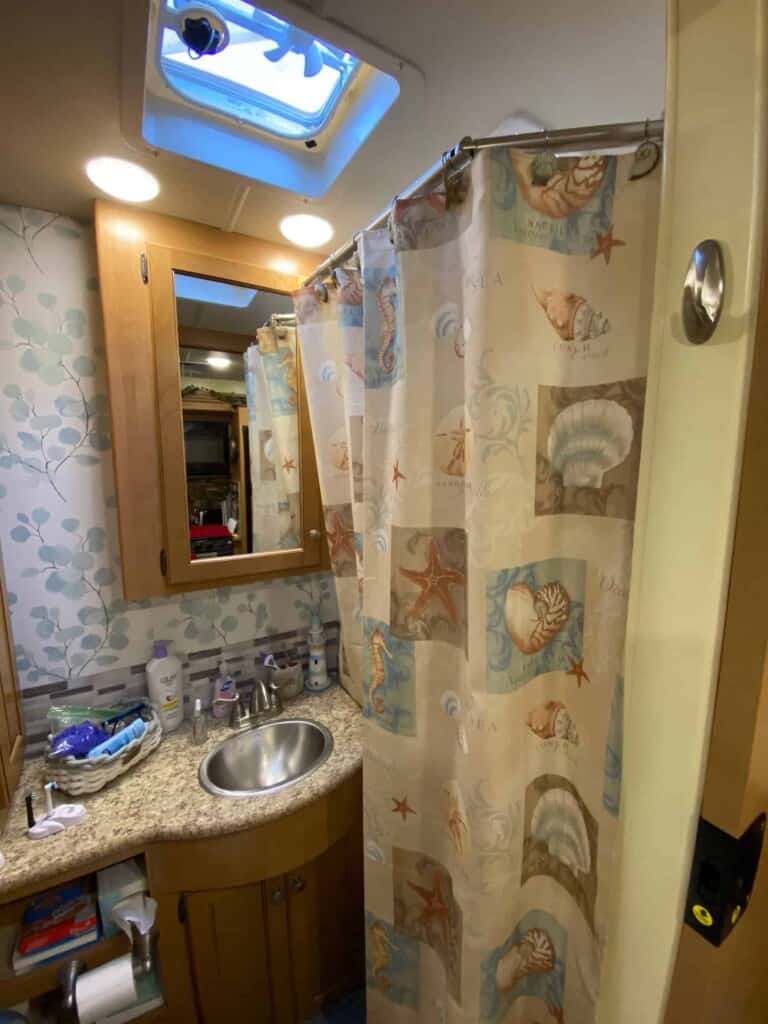
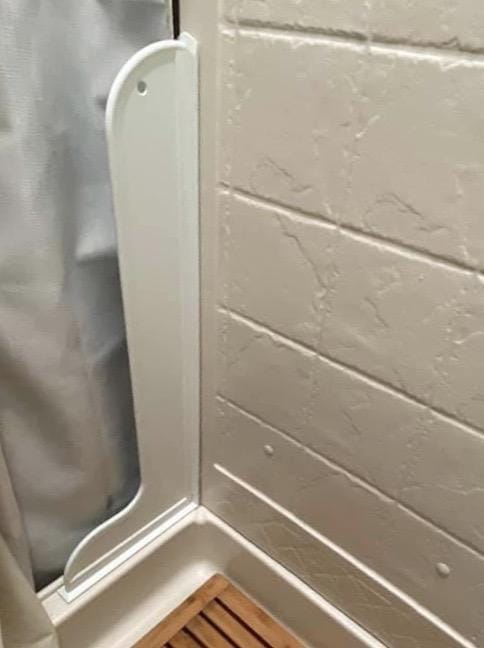
An Extended Shower Curtain Rod Creates More Space
Our RV shower enclosure came with a typical articulating sliding glass door. It looked nice, for sure, but we had three issues with it.
• The door didn’t slide open as far as we would have liked, making getting in and out of the shower a little cumbersome.
• Our glass glass enclosure didn’t provide any way to enlarge the RV shower’s modest 24” depth.
• We travel full-time in our rig, which means that RV weight is always on our minds because we run close to our GVWR (Gross Vehicle Weight Rating). We’re always looking for ways to reduce weight and increase our cargo-carrying capacity.
We removed the factory glass enclosure and door, replacing it with a Stromberg Carlson extendable shower curtain rod.
We love it!
Now is it easier to get in and out of the shower. With the curtain rod extended outward, we have more elbow and shoulder room for showering.
And, when the rod is folded inward, it is completely out of the way. Then it is the perfect place to hang wet or damp items to dry.
It also allowed us to add a more decorative touch to the RV bathroom with a seashore-inspired shower curtain.
Our other goal was also achieved. Since getting rid of the glass and aluminum shower enclosure shaved off 43 pounds of weight from our rig.
Splish Splash Guard for Showers
With our change from the glass shower door enclosure to a shower curtain setup, we wanted to be sure no water would sneak out from behind the curtain.
A quick trip to Lowes Home Improvement gave us the solution: The Magic White Splash Guard.
This shower splash guard is a full 28” tall by 10” wide at the base.
It attaches securely to the side and bottom lip of the RV shower stall with included self-adhesive tape.
We’ve been very happy with its function and no water escapes the shower.
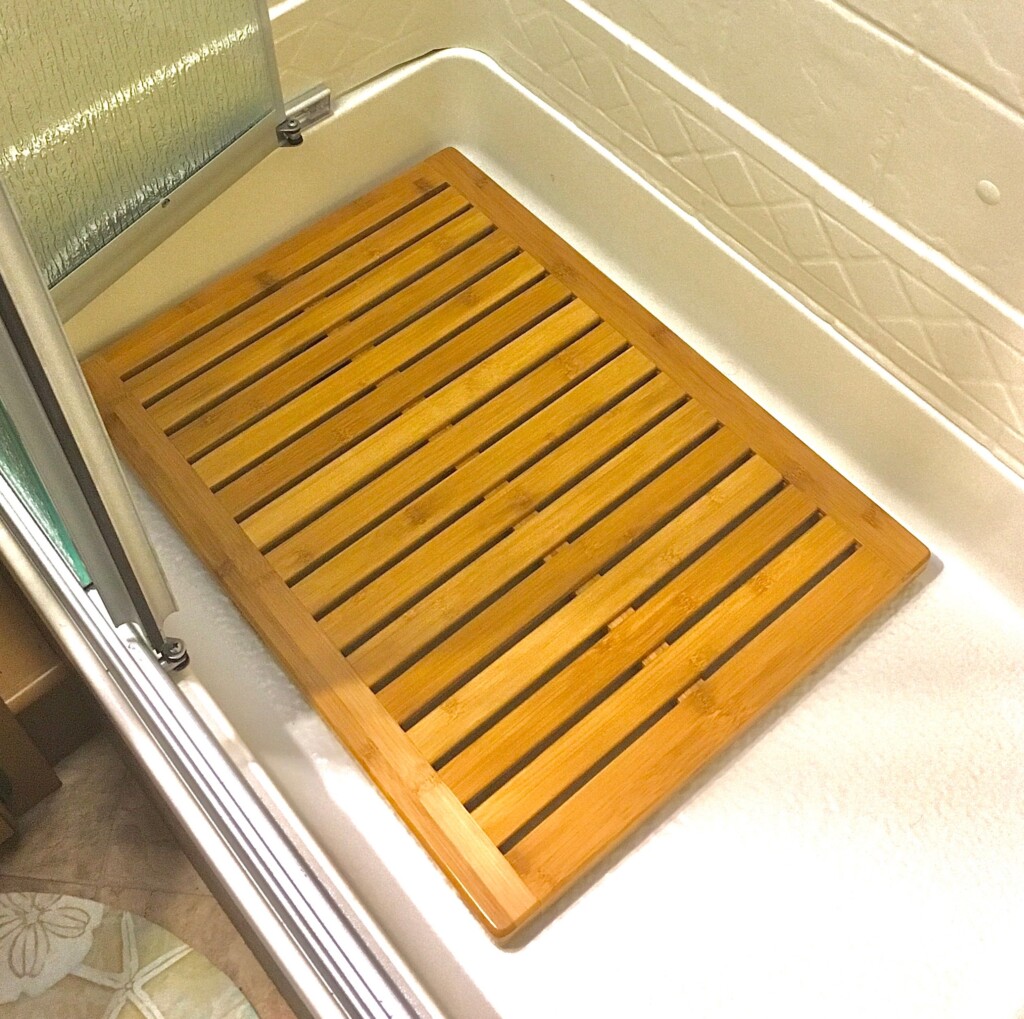
Bamboo Shower Mat Gives Function and Aesthetics
Many RV shower bases don’t have the grippiest of surfaces, and some don’t have the best support underneath. Ours was one that had a fair amount of flex in the floor, especially around the drain. While we couldn’t easily add more support under the shower pan, we found a nice looking solution.
We added an18” x 24” bamboo shower mat. We like the warm wood look and the surface is not slippery when wet.
The bamboo mat also helps distribute our weight across the shower pan, eliminating any flexing of the base.
We’ve had it for nearly four years and it’s still in great shape.
Conserve Water with a ShowerMiser RV Shower Water Diverter Kit
The final upgrade to our RV shower was installing a kit designed to conserve our freshwater and gray water holding tank capacity. This kit is especially handy when boondocking and dry-camping.
The ShowerMiser kit lets us divert the initial cold water when we turn on the shower back into our fresh water tank (while waiting for the hot water to get to the shower head).
This avoids wasting the cold water and keeps it out of the holding tank.
Once hot water reaches the ShowerMiser device, the blue temperature-reactive plastic tube turns white. Then, we flip the diverter valve and take a nice, hot shower.
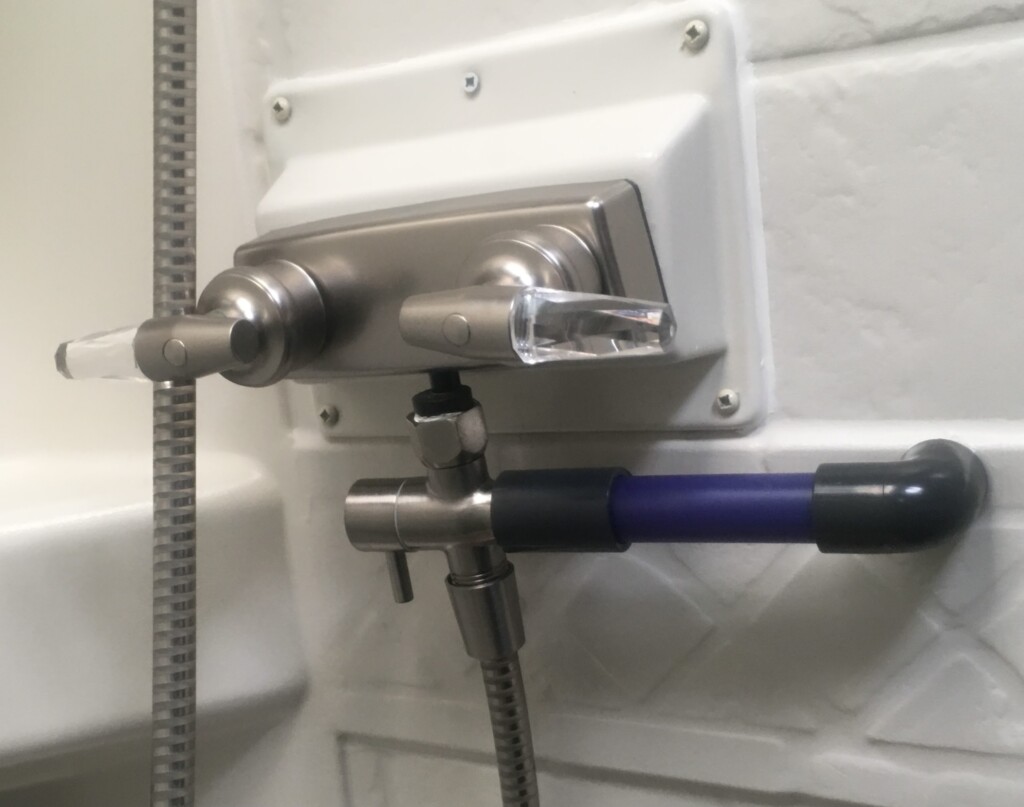
There was another benefit to adding the ShowerMiser upgrade to our RV shower. When we hook up to campground water utilities, we use the diverter function to fill our fresh water tank via the park/city water inlet. It’s quite handy and eliminates the need to run a separate hose to the fresh tank water fill on the other side of the RV.
Of all our RV shower upgrades, this one required the most installation effort and time. But it’s also the one upgrade we find most useful.
These five RV shower upgrade projects are inexpensive RV shower upgrade projects that made our RV more functional and pleasant to use. Consider them for your RV project and enjoy the difference they can make!